Module 3 - Protect Arcadia API with Adv. Waf and APM (Bearer SSO)
In this lab we will deploy a BIG-IP security policy based on Adv. WAF and APM, in front of the NGINX+ API GW. In order to make life better and simple for DevOps, we will delegate all the Authentication layer to APM. APM will authenticate JWT tokens coming from different providers with different keys, and we will use APM Bearer SSO in order to share a unique JWT key with the API gateways.
Note
APM will download keys from external providers automatically (by using OIDC discovery process) and will use another an unique key for internal SSO with NGINX API Gateways. This will allow DevOps to know only one key for all their deployments. And SecOps will manage the external providers.

Configure NGINX Controller with a new Identity Provider
In the left menu, click on
Identity ProvidericonCreate a new Identity Provider as below. Use the JSON code below for the JWK
{
"keys": [
      {
      "k": "aWxvdmVuZ2lueA",
      "kid": "9876543210",
      "kty": "oct"
      }
   ]
}
Note
I invite you to decode the “k” value to know what is the
key. As you can notice, we don’t use a RSA key, but a secret (just to simplify the lab). This secret is BASE64 encoded.
Assign this
Identity Providerwith your API DefinitionGet back to your
API definitionandeditthePublished API
Click on
routingand edit theSecurity Settings
Click on
Add Authentication
Select the provider created previouly
JWT Bearer SSOandBearer
Click
DoneandSubmitClick
Submitagain
Make a quick test with
Postmanby sending a request to the Arcadia API likeLast TransactionsorBuy stocksYou can see a
401 Unauthorized
Note
As you don’t insert any JWT token in your request, the API GW rejected the request. It is time to configure APM to inject this JWT Bearer SSO
Configure Adv. WAF and APM
Note
In this lab we will use Access Guided Configuration and we will do some custom tuning in the policies. There are several ways to protect API with BIG-IP, but at the moment, we will focus on AGC so that you can understand how it works. GSA team is working on a dedicated UDF Blueprint for API Declarative WAF policy with v16.0
Connect to the Jumhost (user / user)
Open
Chromeand connect to the BIG-IP (admin / admin)Delete the existing
vs-arcadia-apiVirtual Server in the BIG-IP. We are going to create a new one from the Guided Configuration.Create a JWK Bearer SSO key. If you remember below, the key (encoded64) was
aWxvdmVuZ2lueA, and decoded64ilovenginxClick
Access>Federation>JSON Web Token>Key ConfigurationCreate a new key as below with the value
ilovenginxas Shared Secret
Warning
Don’t forget to set an ID. It is mandatory in order to use this key in the Bearer SSO profile
In
Access, click onGuided Configurationand select the templateAPI Protection ProxyinAPI Protectiongroup
Configure the template as below.
Warning
The AGC template does not support yet OpenAPI spec file Version 3. But only Version 2. We will use another version of the OAS file.
Note
The OAS file is located in
Downloadsdirectory and its name isswaggerArcadia2.jsonCheck the boxes
Use Rate LimitingandOAuth 2.0
Select the default Servrer at the bottom of the screen

Note
You can notice the URI and the back server have been imported from the OAS2 file


Select
AzureADAAD-F5Salesas providerWarning
Due to a bug in AGC, we can’t add more providers here. We will modify the list later on directly in the APM configuraiton (ID 835509)

Configure
Signle Sign-On Settingsas below
Note
We will focus on Claims later on
Configure
Rate Limitingas below. We will limit request per user based on their Email address extracted from the JWT token. The value used for theUser ID Keyissubsession.oauth.scope.last.jwt.Email
Configure the
Virtual Serveras belowVS : 10.1.10.18
Log All Requests
Client SSL arcadia_client_ssl

Click
Deploy
Now we have to add manually the 2 more providers in the APM configuration (due to the BUGID in AGC 6.0)
Unstrictthe configuration in AGC, by clicking on thelockicon and approve the change.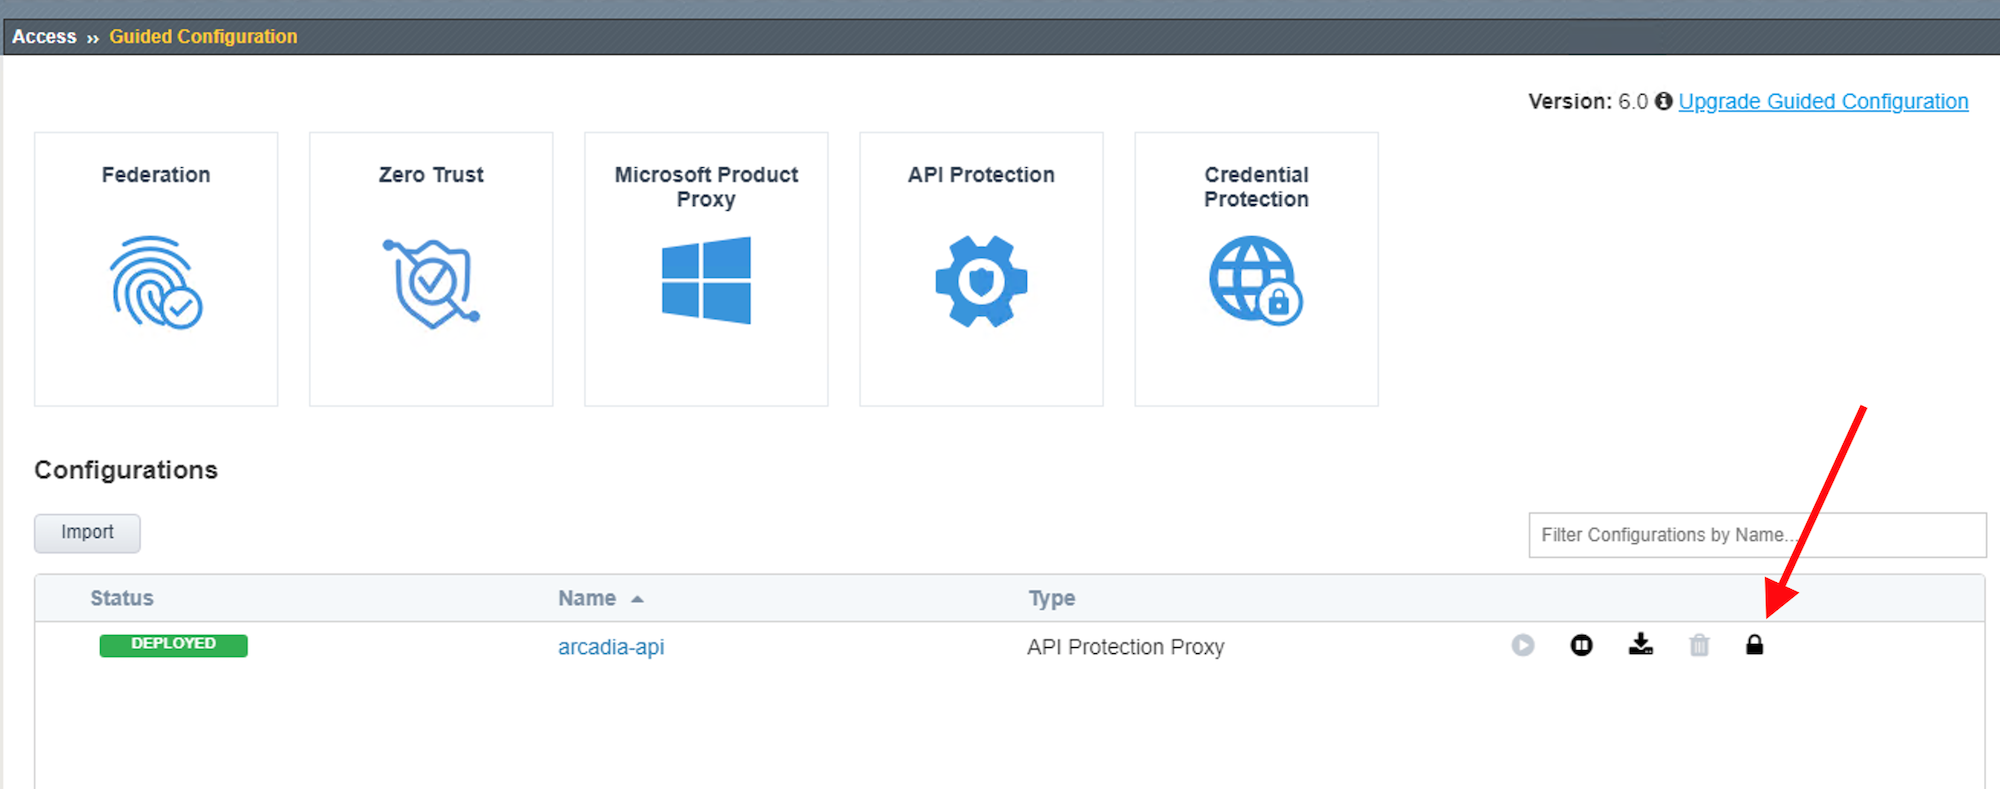
Click
Access>Federation>JSON Web Token>Provider Listandeditthe existing profileAdd
provider1andprovider2into the list
Note
Congratulation, Arcadia API is protected by an Advanced WAF (you can check the policy) and APM in order to authenticate requests from 3 providers.
Note
I invite you to check the Access > API Protection configuration
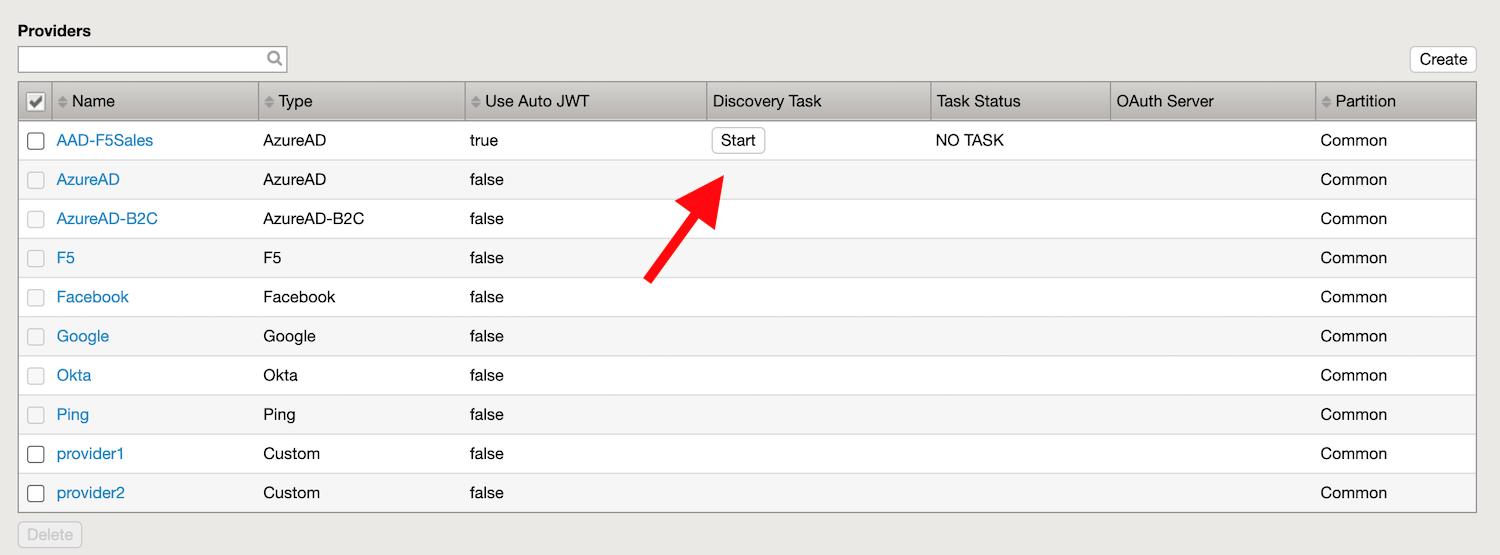
Warning
In order to use Oauth with Azure AD, you have to force an update of the Azure JWT keys. In Federation > Oauth Client / Resource Server > Provider, click on Start button to force APM to download the new keys.
Test your protected API with Authentication, WAF and Rate Limiting
Open
Postmanand select theArcadia APIcollectionSelect one call, the one you want.
F5ers only - For F5 partners and customers, please jump to the next bullet point.InauthenticationselectOauth 2.0. We will start with an Azure AD provider - similating a partner having an AAD subcription and wanting to use it.Click
Get New TokenI have already set the values for the Oauth Client. As a reminder, here, Postman is the Oauth Agent - it is requesting the Access Token

Authenticate with your Corporate F5 account. If it fails, it means you are not part of the F5 Sales Azure tenant (Open an IT Ticket)
When done, click
Use tokenand send your request.
Note
It passes. Token is approved by APM, and a new token is generated by APM and sent to the NGINX API GW (Bearer SSO)
Available for F5ers, partners and customers. Now, try with the 2 other providers (partner1 and partner2)You can find the tokens on the desktop in the file
JWT tokens.txtDon’t use
Oauth 2.0, as we already have the tokens. But useBearer Tokeninstead. I generated these tokens from the website http://jwtbuilder.jamiekurtz.com/
Partner 1:

eyJ0eXAiOiJKV1QiLCJhbGciOiJIUzI1NiJ9.eyJpc3MiOiJwYXJ0bmVyMSIsImlhdCI6MTU5MzQ1NTk4NSwiZXhwIjoxNjg4MDYzOTg1LCJhdWQiOiJhcGkuYXJjYWRpYS1maW5hbmNlLmlvIiwic3ViIjoiYXBpLmFyY2FkaWEtZmluYW5jZS5pbyIsIkdpdmVuTmFtZSI6IkpvaG5ueSIsIlN1cm5hbWUiOiJSb2NrZXQiLCJFbWFpbCI6Impyb2NrZXRAZXhhbXBsZS5jb20iLCJSb2xlIjoiTWFuYWdlciJ9.JRboDfKWvSLVU3md6OULGifoVxJ-ryx7y-0DKrOlPOM
Partner 2: eyJ0eXAiOiJKV1QiLCJhbGciOiJIUzI1NiJ9.eyJpc3MiOiJwYXJ0bmVyMiIsImlhdCI6MTU5MzQ1NTk4NSwiZXhwIjoxNjg4MDYzOTg1LCJhdWQiOiJhcGkuYXJjYWRpYS1maW5hbmNlLmlvIiwic3ViIjoiYXBpLmFyY2FkaWEtZmluYW5jZS5pbyIsIkdpdmVuTmFtZSI6IkJvYiIsIlN1cm5hbWUiOiJUaGUgU3BvbmdlIiwiRW1haWwiOiJib2JAc3BvbmdlLmNvbSIsIlJvbGUiOiJDb250cmFjdG9yIn0.aqTxd6X4z7EFijJsyiuq8mZAKMLG519Bmjz1ra24L-sTest the Rate Limiting by sending 4 calls with the same token. The 4th will be block. You can notice the reponse code
429 Too Many Requests
Send an attack
Select the call
POST Buy Stocks XSS attackSend the request and notice the
200 OKresponse. It means the WAF didn’t block the requestCheck why and change your policy accordingly.
Note
Tip : attack signatures are in Staging mode